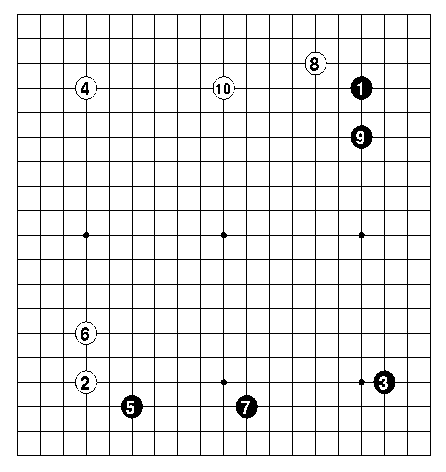
 Figure 1 (1-10)
One of the most intriguing chapters of the new book, "Killer of Go", just published by Yutopian Enterprises, has the same title as the one above. The point is that one shouldn't fear a "killer" in go: either this player is an ersatz "killer" and will overplay an attack, thereby giving one an easy win, or else, more rarely, the "killer" will be a real one, and this will give one a chance to test one's own mettle against a superb adversary. Sakata Eio put this idea to the test in the 1974 Nihon Kiin Championship, when he put his title on the line against "Killer Kato" Masao.
In the first two games of the best of five match, Kato had indeed killed big groups of stones, and now Sakata, playing black in this third game had his back against the wall. He had to bring all his skills at survival (shinogi) to bear in order to have a chance to win the match, and the games that resulted were classic confrontations between a master of attack and a genius of defense.
Figure 1 (1-10)
In the last installment of this series, the reader was exhorted to cultivate whole-board vision in order to maintain balance in one's game as well as to gain the advantage if conditions are favorable. Considering these factors, where would the reader play black 11 in the board position above?
Sakata pointed out that black 1 in Diagram 1 was possible, but that white had a clear-cut strategy to pursue in this case by playing 2 through 10. Sakata didn't want to make things easy for his opponent.
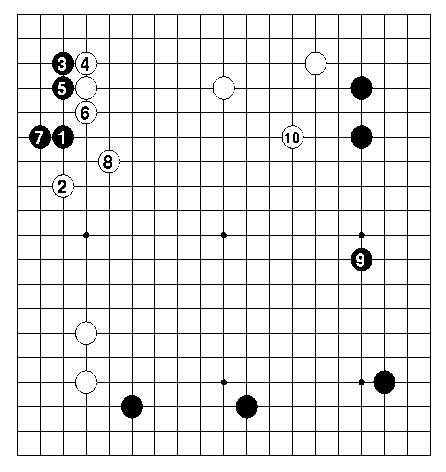 Diagram 1
In Figure 2, black concentrates on making territory, while white makes thickness, but this is perhaps inevitable. For example, if black did not invade the lower left corner with 17, a white move at 17 would have captured the corner as well as killing black's other stone on the lower side. White continues to build thickness with 38 through 52. This will only be valuable if white can use it to attack. But Sakata was confident that he could deal with this:
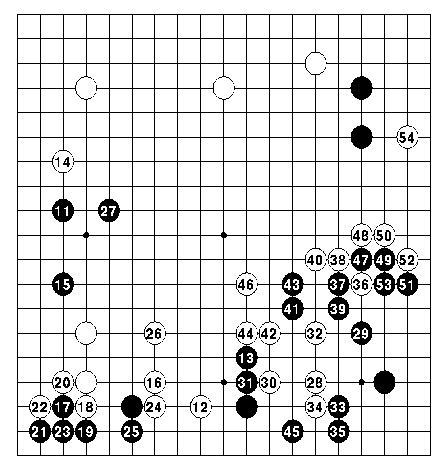 Figure 2 (11-54)
White's thickness on the right side is mitigated by black's solid position on left side, especially by the move at 27. However, white attacks with 54. This kind of attack can be frighten ing when played by a "killer". Sakata was reluctant to respond to white's unorthodox attack with black 1 and 3 in Diagram 2. The moves from white 4 to 8 would leave black feeling uneasy.
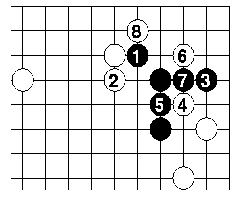 Diagram 2
Sakata also mentioned that white 62 was a mistake, and should have been played one point to the left. The reason is shown in Diagram 3.
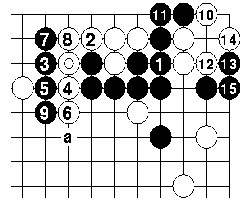 Diagram 3
Since white has played the marked stone there, black is able to
answer white's probe at 80 in Figure 3 with the connection at 1. White
2 can be answered with black 3 through 9. Now a white move at a would
threaten black's four stones to the left, so black would have to
defend against that threat, allowing white to attack the corner. The
moves to white 14 create a "flowery six" shape in the corner, which is
only good for one eye. It seems like black again has a problem. But
black has a better way of dealing with white 12. Black 1 in Diagram 4
is a better response.
Diagram 3
Since white has played the marked stone there, black is able to
answer white's probe at 80 in Figure 3 with the connection at 1. White
2 can be answered with black 3 through 9. Now a white move at a would
threaten black's four stones to the left, so black would have to
defend against that threat, allowing white to attack the corner. The
moves to white 14 create a "flowery six" shape in the corner, which is
only good for one eye. It seems like black again has a problem. But
black has a better way of dealing with white 12. Black 1 in Diagram 4
is a better response.
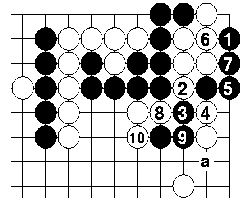 Diagram 4
After the moves to white 10, capturing white's
stones in the corner threatens a move at a, securing life for black.
Diagram 4
After the moves to white 10, capturing white's
stones in the corner threatens a move at a, securing life for black.
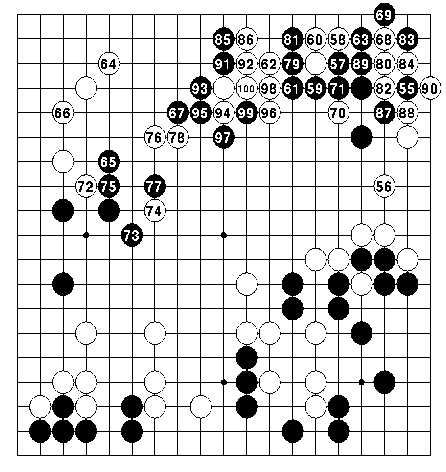 Figure 3 (55-100)
One last word about the previous figure. It seemed like black had managed to tide over all his difficulties with the group in the upper right, but there was one other danger point. Kato pointed out after the game that in answer to black 95, or black 1 in Diagram 5, instead of playing 96 he should have played at 2. After exchanging white 4 for black 5, the move at white 6 would now prove more threatening to black. White 8 seals black in and forces black 9. (Or else white will force with the atari at 9 and then attack at a.) Then move at white 10 will call the life of the group into question.
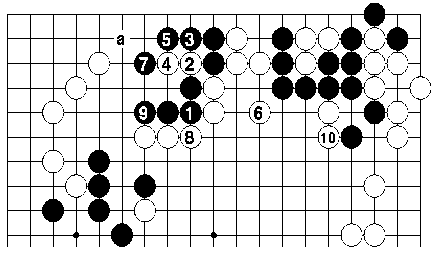 Diagram 5
Although "Killer Kato" missed his best chance to capture a group here, he was relentless in his attempts to continue the attack. He managed to put black's other group on the upper side on the defensive, forcing it to live on a small scale with 35 and then turned to his last chance for an attack: black's weak group on the left side.
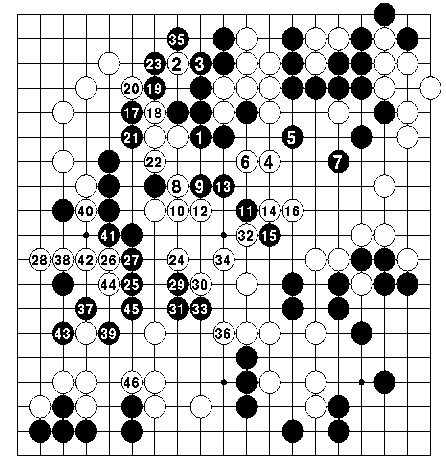 Figure 4 (101-146)
This is a perfect illustration of the title of this article. It is very difficult to actually kill groups: as the go proverb states, "Big stones never die." The game will be decided here.
The moves in Figure 5 leave no question about the outcome of the game. Black is ahead in territory, so he has only to secure the life of his group on the left to win. In answer to black 57, white might have tried to connect at 1 in Diagram 6, but black cuts with 2 and 4. If white persists with the attack with 7, black makes an eye with 8 and 10 and then, after throwing in a cut at 12, counterattacks at 14. Even if white plays at a, black b threatens white's six stones above. White cannot make eyes and the race to capture between the two groups is in black's favor.
 Diagram 6
Sakata went on to play another brilliant defensive effort in game four of the match, squaring the score at two wins apiece. And "Killer Kato" cracked in the fifth and final game, committing a losing mistake by making a threat during a ko fight which actually accomplished nothing. The "Killer of Go" had been welcomed and defeated, resulting in one more brilliant triumph in Sakata's illustrious career.
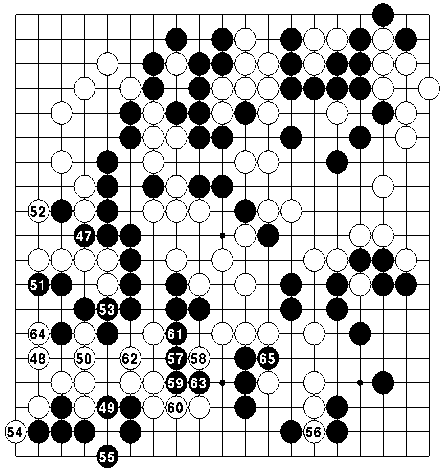 Figure 5 (147-165)