Comparing Methods to Digitize  Slides

Before I went digital, I accumulated thousands of slides and negatives, and of course, now want these treasures available as bits.  Here, I compare seven methods to transfer slides to digital.  The images below were captured with ordinary due care, lightly color corrected, then cropped to equivalent coverage, but otherwise not manipulated.  The high resolution original was then scaled to fixed size for presentation here.  Click on the individual images to get the full resolution original.


HP scanjet 6200c
converted using slide-to-photo
Coolpix 990 Dimage Scan Dual dimage scan elite
coolscan 4000
Flatbed Scanner
HP Scanjet 6200C

It's tempting to use a simple attachment to a flatbed scanner to scan slides.  This attachment is made by HP and is basically a mirror box which directs light around to the back of the slide, so the scan sees mostly transmitted light instead of reflected light.   The mostly is an important consideration;  Since lots of light is hitting the slide in the normal reflective path, dust on the near side of the slide or on the scan bed appears as white spots  rather than black spots, and white spots are a lot more visible than black.  At 1200 dpi, scans seem pretty soft and lack contrast, even after pre-scan adjustment. 

 scanjet adapter
The mirror box looks like a pretty generic design, but it is not.  The specifications are precisely tuned to the geometry of the scanner; it doesn't work even with close family members of the scanner it is designed for.
Flatbed Scanner
Microtek 9800XL

Its also interesting to try a relatively expensive scanner with a correspondingly expensive transparency adapter.  This mictotek scanner costs approximately $1800 with the transparency adapter, and claims to scan at 2000 dpi.  However, the detail available is less than the detail achieved by the HP scanner at 1200 DPI.

microtek adapter
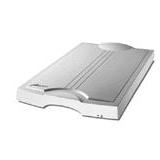
One advantage of this scanner/adapter combination is that it can scan large transparencies, presumably up to the full size of the scan bed.
Projector based copier                                                  Direct copy attachment
Digital Camera
Nikon Coolpix 990

A Digital Camera can be used as a quick and dirty way to digitize slides.  At 2048x1600, that's roughly equivalent to a 1800 dpi scan.  Not bad, , but I've never been very satisfied with the results.  

The shot on the left was taken using my projector and a device called Slide-To-Photo.  The company that made Slide-to-photo seems to be defunct, but similar products probably exist, or you could build your own. Slide-to-photo is a frame that links camera and projector in a mechanically stable way, so once set up, you can iterate next-slide/shoot very quickly.   This approach is  generic enough that it will probably work with just about any projector and camera (good) but the copies are only as good as your projector lens (many projector lenses are amazingly bad) and it's impossible to avoid some degree of keystoning because the projector, screen, and camera cannot all be in a line.  Some models of carousel projectors have a rear-projection "preview" screen that could be used similarly.

The default lens sold with most slide projectors, including typical Kodak carousel projector zoom lenses, is really bad.  If you're using this kind of consumer-junk lens, expect lower quality than seen in this sample.  I spent an extra $150 on a good lens for my projector.
slide-to-photo
The shot on the right was taken with a slide holder that mounts directly on the camera, using the Coolpix macro capability to focus directly on the slide.  The downside of this rig is that you still have to deal with your slides one at a time, and whatever attachment you use will probably be specific to your particular camera.   The upside is that since your camera points directly at the slide, without additional lenses or focusing screen, the quality is maximized.

Setups like this have to be carefully matched to the mechanical and optical properties of the camera, so be sure to search for something that is known to work with your camera.
happenstance copier
I haven't tested this, but it looks like a reaonable packaging of the camera-plus-slide-holder into a dedicated USB device.  This particular device is being sold for about $100 under a number of different names.  Similar or improved versions are bound to appear.
dedicated scanner

Typical problems with any camera based conversion are excessive contrast and odd color balance, which require a lot of tweaking in photoshop to fix..  It's also surprisingly difficult to get the framing right using only the camera's LCD to aim.  This transfer actually looks better than most.  I should also note that the Coolpix' options for adjusting exposure, contrast and white balance are not particularly useful in this process.

Finally, the players in this camera-add-on market come and go.  For example, both of the specific products shown here no longer exist - search the web for current products.

Consumer Transparency Scanner
Minolta Dimage Scan Dual

This is the result from a scanner designed for the task, but priced suitably for home use..  I think it speaks for itself, even at the resolution you see here.  The original scan is at 2400 dpi.

scan dual

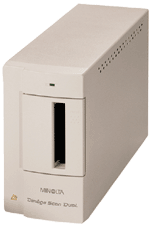
You probably can't find a scanner this old any more, or if you do it will be very cheap.

Prosumer Transparency Scanner
Minolta Dimage Scan Elite

This is the result from a better scanner, but still priced suitably for home use..  The Scan Elite is slightly higher resolution, slightly better density range, slightly faster, and incorporates Digital Ice technology to remove dust.  The original scan is at 2820 dpi.

scan elite

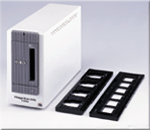
The price/performance ratio of scanners in the consumer price range is improving rapidly,  but using this kind of equipment is still time consuming and requires lots of practice to get good results.

Professional Scanner
Nikon Coolscan 4000

This is the result of a professional scan by Larsen Digital, using expensive equipment, and scanning at maximum 4000 dpi resolution.  Note that professional scans are not automatically at such a high resolution - you probably have to pay more.
coolscan 4000

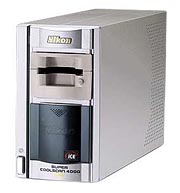
For all practical purposes, 4000 dpi  is all the resolution there is on a 35mm slide, but there is still room for improvement in color and dynamic range, even at this level of technology.
detail
size normalized
detail
size normalized
hat detail
size normalized
detail
size normalized
detail
size normalized
scan elite detail
size normalized

original size


Method #7 is effectively "Pay Someone else to do it"
 Here are the pros and cons as I see them:
 
Pro Professional
Pro Do-It-Yourself
  • It doesn't take a lot of your time.  Send 'em off and wait.
  • Cheap if you only need a few
  • Consistent, if not perfect, quality.
  • Best quality (after practice)
  • Cheap in the long run (if you work for free)
  • Immediate results (after you buy the equipment and practice with it)
Con Professional
Con Do-It-Yourself
  • Long delays and risk of loss or damage to the originals.
  • Expensive when you get into hundreds or thousands.
  • One-size-fits-all treatment with respect to color correction and dust removal.
  • Requires lots of time and fussing to get quality results.
  • High initial cost

ICE makes a difference

You could spend a lot of time cleaning and cleaning and cleaning your slide, or using photoshop on the scan to get rid of these little pieces of crud, but the digital ICE technology incorporated into newer transparency scanners is almost like magic.  

detail no ice
Detail, without ICE
detail ice
Detail, with ICE


Final Notes:

comments/suggestions to: ddyer@real-me.net
my other photo pages
my home page